|
 |
|

This is very simple to do providing that your marking out is accurate. Make sure that each panel is large enough to be cut down in such a way that it can be matched to any adjacent panel. Plan out your work in advance and make sure that the grain is running the way you want it. Try to work from a single leaf or consecutive leaves to keep consistency of colours. Make sure you don't turn consecutive leaves unless you know the effect the the light will have on your finished product. |
|
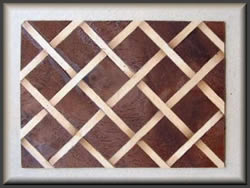 This is the finished product. |
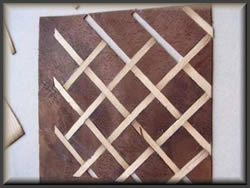
 Start by clearly marking out the trellis on the working side of your background veneer (waster). Notice that the shading has been marked as a guide at alternate junctions in each direction. |
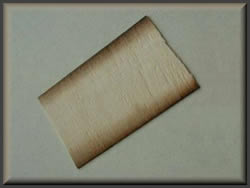 Now for the inserts. Cut a strip of light coloured veneer such as chestnut, the same width as one insert. Gently sand shade the edges as shown in the picture. |
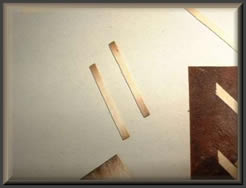 Now cut a series of inserts the width of your trellis |
 Cut out the slots and insert the strips. The shaded ends always butt up to the centre point of a strip at right angles to it to create the optical illusion that they are crossing underneath. Try to avoid gaps. |
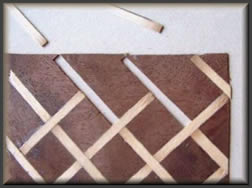 Keep going until the panel is completed.
|