When I wrote my last article for the Marquetarian Clive Jones contacted me and not only did he send me a great deal of material but asked me to write another missive explaining the problems of not having that essential back-up “A Marquetry Group”.
Having now produced just about enough material to illustrate some of the basics here goes warts and all.
|
|
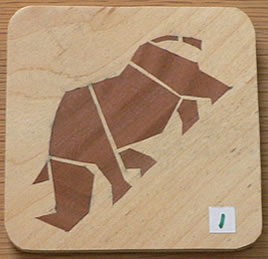
Coaster No.1
This is my first attempt at any Marquetry, the pattern was supplied by Meopham Marquetry Group when the Kent Woodworkers attended a taster session and is to my mind designed as an exercise in using a scalpel to cut veneer.
After many attempts re-cuts and not a few frustrated exclamations the rhino was finished. The next job was to mount it onto the baseboard by glueing it in position. Having read it is best to place a piece of plastic over the face to stop the chance of it sticking to the press this I did, as I rightly thought my wife would not be at all pleased if her flower press was destroyed.
|
Using a PVA glue the veneer was put in the press and left, twenty four hours later it was unclamped and green mould had formed where the moisture was not able to escape as it dried off. “Sick as a parrot” was an understatement.
Since this incident a sandwich using a sheet of white kitchen paper backed with a layer of corrugated cardboard is applied to both faces before clamping and no problems have been encountered since. |
|
Coaster No.2
About four attempts later and fed-up with the sight of rhinoceroses I decided to at least show something for my efforts.
The slip made with the scalpel is obvious at the toe of the front foot, the defect in the rear leg occurred during sanding.
The only explanation I can think of is that mahoganies can take up particles of sand during growth and as luck would have it poor old rhino found one, filling only aggravated the problem.
The coaster now resides in the fridge to stand the milk jug on, out of general view.
|
|
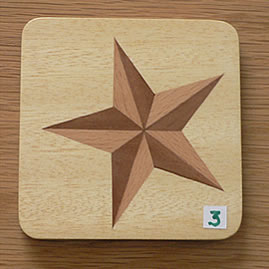
Coaster No.3.
OOp’s it slipped during the glue up.
Another lesson learned.
|
|
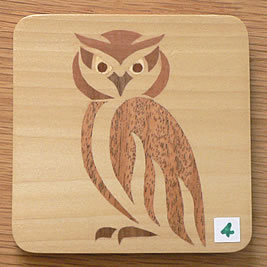
Coaster No.4.
Owl had his problems i.e. cutting the wave-like shapes, another case where membership of a group would have solved the mystery straight away.
It wasn’t until after I had completed the cutting, after several unsuccessful attempts, the idea of sticking masking tape to the back to give support to the short grain came to my attention.
Sometimes it’s the simplest solutions that don’t occur to you.
|
|
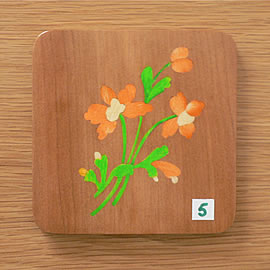
Coaster No.5.
The coaster that everyone hates, especially “she who must be obeyed” and my most amateur attempt so far. If I remember this was my first adventure into curves and thinner cuts done immediately after number three, labelled “oop’s”.
The colours were made by steeping the veneer in food dye. Not a good idea as it fades rapidly in sunlight but sufficient for the experiment with colour on a dark background, as you can see it was not a success to put it mildly.
This one is also out of site situated under one of our numerous houseplant pots.
|
|
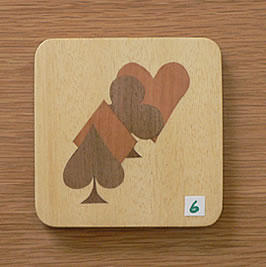
Coaster No. 6.
This is I suppose my first attempt at window marquetry working from the rear heart shape forward and using masking tape reinforcement made the job much easier.
|
|
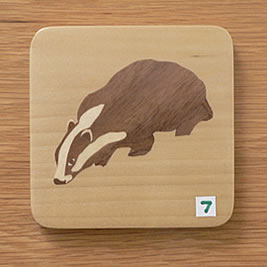
Coaster No.7.
Badger has had so many alternative veneers representing his feet, each one rejected, eventually coming back to where he started. Aficionado’s of wildlife will also know that he should be dark grey with white wispy hair strands sticking out all over. Not only didn’t I posses grey veneer but the white wispy fronds are beyond my capabilities at this time. His final finish is “work in progress”.
Grain and texture.
“Who the devil does this bloke think he is? He’s only been a member five minutes and he keeps sticking his oar in” there I’ve said it for you, so now lets carry on and stop messing about.
|
Why do you always want to achieve a mirror or piano finish? Is it that in the past marquetry was only used on the best and highest quality furniture and ever since marquetarians have tried to emulate their predecessors, has it not occurred to anyone that a lot of the beauty of timber is not just in its colour and grain but also its texture.
Rubbing the surface down with ever finer abrasive papers to obtain a mirror (or featureless) finish takes away much of the character of the timber. Imagine what an effect it would have on some of the pictures entered into international competitions if, as the picture was viewed from different angles, the textures of the veneers used to create the image changed, as also would the colour/s due to the variance in the reflection of the light from the surface. It might make the pictures come alive and not appear like wooden photographs.
Perhaps you should take a lesson from the breeding standards for pedigree dogs; these had to be revised as they were found to be over zealous and detrimental to the breeds.
HOW many “Rosebowls” does it take to kill a new member?
Lastly have members any suggestions as to how to efficiently file veneers? Do you do it by timber types, colour or grain etc. What type of containers are recommended. Mine are just a jumbled heap.
|