In this demonstration stringers and borders have been attached to the picture. The back, the ends and sides have been attached to the base board. Accuracy in ensuring the picture and borders are square prior to gluing is very import because once stuck down any slight imperfections will be immediately noticed. It may be found easier to lay the picture down before attaching the stringers and borders as slight imperfections in squareness are more easily remedied.
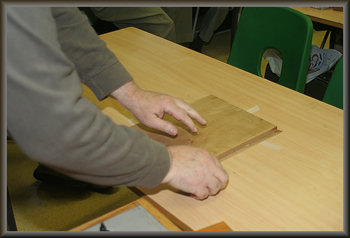
Place the picture face down on a flat surface and place the baseboard centrally on it ensuring that the mitres are aligned with the corners.
Draw a pencil line around the border
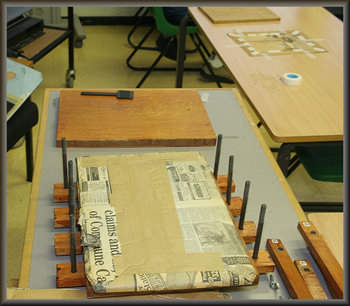
Place the first paper wadding on the base of the press. It is advisable to have some kind of plastic on top of the wadding to prevent the paper being stuck to the picture.
Spread PVA (in this case) glue over surface of the baseboard with a combed spreader. Ensure that the glue covers the whole surface but not too thickly.
Place the glued surface of the baseboard onto the picture, lining it up with the pencil marks that have been drawn. Apply hand pressure and move it around to expel air and to gain adhesion and attach adhesive tape to ensure that it will not move when pressed.
Place the picture centrally, face up, in the press.
Place plastic over the picture followed by the second piece of paper wadding.
Place the top board of the press over the picture followed by the cross members, curved side down.
Tighten the butterfly screws from centre out applying equal pressure to each one.
Screw down tight.
Leave overnight for the glue to set properly.
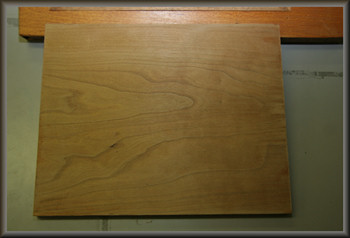
The rear view of the pre-veneered baseboard
prior to the facing surface being coated
with glue as will be seen in the
following photo sequence
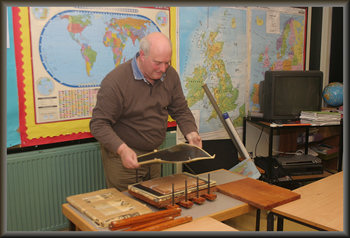
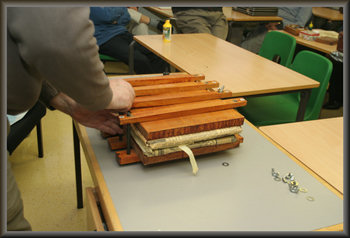
The component parts of the press
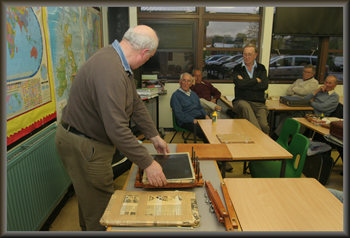
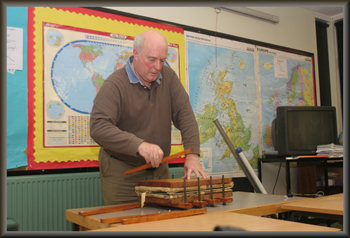
Our demonstrator Dave starts to assemble the lower levels
of the press prior to
gluing the baseboard
and
placing the picture package assembly in it
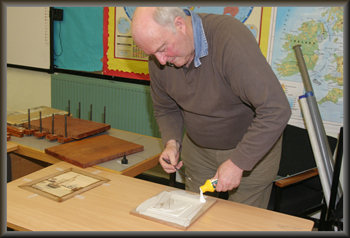
Dave now applies the glue to the baseboard after first making
sure that the paper wadding and bottom plastic sheet are
in position in the press as seen in the previous photo
Dave uses a plastic spreader to make
sure that the entire mating surface
of the baseboard is liberally
coated
with glue
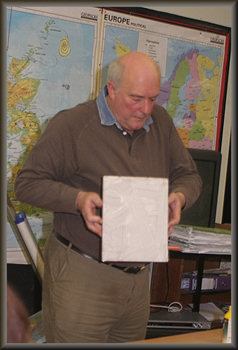
The baseboard fully coated with glue
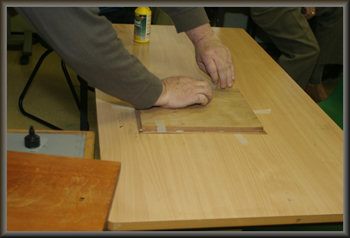
Placing glued baseboard onto the picture veneers
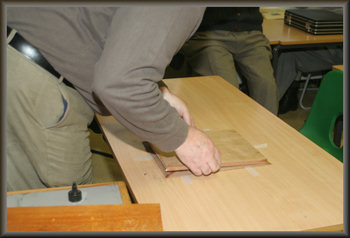
Applying hand pressure to exclude air and align both parts
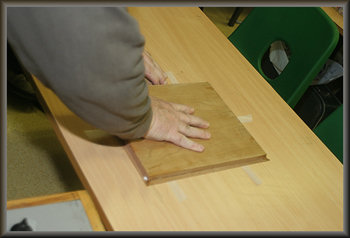
Taping the baseboard & picture together after aligning
Finishing the taping and then placing the assembly in the press
Dave now places a plastic sheet over the picture pack assembly
Some packing (paper wadding) now goes on top of the assembly
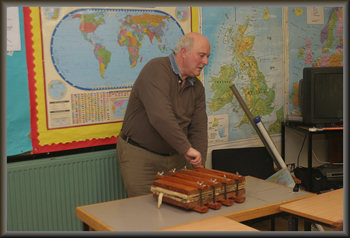
Dave fits the top facing board and cross members of the press
Now adding the wing nuts and washers
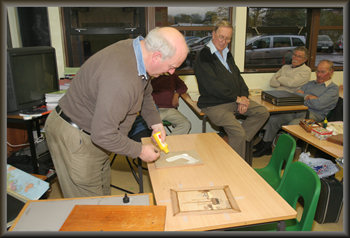
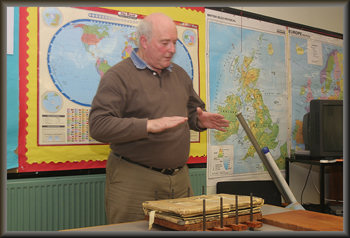
Dave applies the final tightening to the
wing nuts on the press
The press and picture package assembly
is now left overnight to cure