The host group at every one of our National Exhibitions has a huge responsibility to look after each and every one of the exhibits. Pictures are often moved about; they are taken off stands after judging for photographing and then they are re-hung. Very often they will be lifted off the stands to allow for the placement of the security wiring.
It is no surprise therefore, that accidents can, and sadly, sometimes do, happen. Fortunately, I’m pleased to say, it has only happened twice in 25 years in the Society, one of them unfortunately to my group (Chelmsford) and the other last year at Stoke. |
|
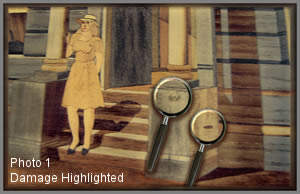
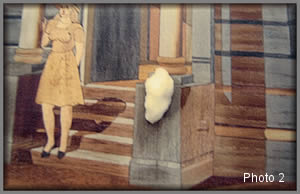
 The damaged sections of the picture on the right hand post
|
|
 A closer view of the damge
|
|
|
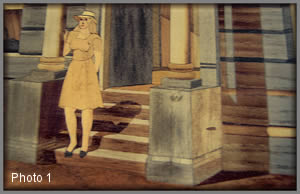
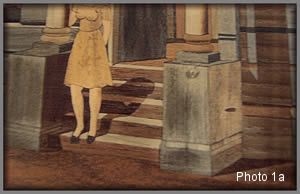
The first of those accidents was repaired by me; and so, with that previous experience taken into account, it seemed only right and proper to volunteer to put Edward Grimmer’s damaged picture right. This was handed over to me at the Executive Committee Meeting in January. The picture (see photos 1 & 1a) had two small dents on the right hand pillar. |
|
 A lighter detailed view of the damage
 |
|
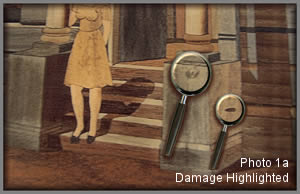 Closer view of the damage shown in the photo on the left
|
|
|
My first job in the repair process was to sand off all the polish, (whilst averting my eyes from her ample charms) down to the bare veneer.
This was important for two very good reasons, the first was to establish how deep the dents were, and the second was to identify the type of veneer used. Also, you must bear in mind, it is not possible to polish small areas “locally”; the whole area of the picture needs to be done in its entirety. If you don’t apply the polish in this way, you will undoubtedly end up with a very blotchy appearance to the picture.
The veneer used for the the front of the pillar was harewood and as we all probably know there can be countless shades of dark and light found in any batch of harewood veneers.
|
 A damp cotton wool swab applied to the dent
|
|
|
My first thought was to patch the damaged area, but without access to the original veneer itself which was actually used for the picture I abandoned that idea. My reasoning behind this decision was, in the main, because the dent was not too deep or broken across the grain and I could use less destructive measures to affect a successful repair.
I therefore decided instead to sweat the dent out. This was done by applying a small, wet piece of cotton wool onto the mark (see photo 2) – but do please note that care must be taken here if the picture was laid using PVA glue as too much moisture could cause a blister.
|
|
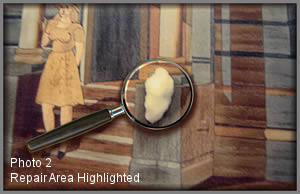 The cotton swab seen under the magnifying glass
|
|
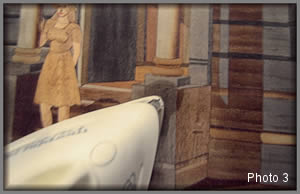 The tip of a domestic iron being used to heat the damage area
|
|
|
Heat, used for creating steam to help ‘lift’ the dent ‘out’, can be applied using a household iron (see photo 3). Only use the very tip of the iron’s sole plate and (sparingly with the heat) moving the iron all the time it is in use. Do not allow the surface area of the iron’s sole plate to touch the picture as this could cause scorching. You will find that all the dented veneer will eventually expand sufficiently to enable that area to be sanded and all evidence of the dent to miraculously disappear. |
|
 Cutting out the second damaged piece
|
|
 Close up of the damage being cut out
|
|
|
 Cleaning out the damage area
|
|
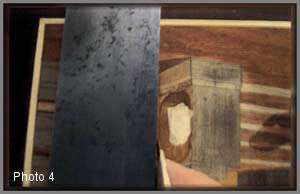
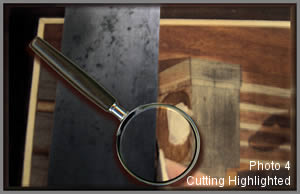
For demonstration purposes with this particular repair tutorial I have decided to show you how a patch can be used in the other damage area to affect a clean repair of the second dent seen in the right hand pillar, which appeared to be made from Walnut.
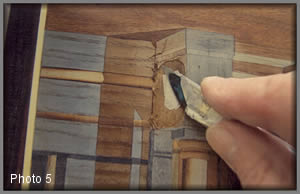
Using a metal straight edge, I cut all around the damaged piece (see photo 4) and then, with a wider bladed knife, I carefully cleaned off all the offending veneer until the resultant window was leveled, cleaned out and ready to accept the new patch (see photo 5).
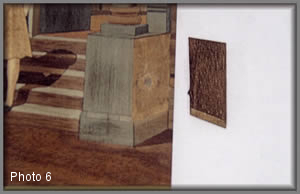
A suitable piece of walnut was subsequently marked up and cut. Do note at this point that sometimes it is better to cut your veneer repair patch slightly larger than actually required and then trim it to ensure a good fit.
|
Photo 6 as seen above shows the new (the repair/patch veneer) piece laid next to the opening in the picture (see photo 6). |
|
 The insert repair piece of veneer
|
|
 Repair piece cut in and taped in place
|
|
|
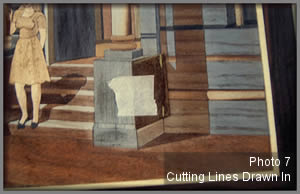
Photo 7 shows the new piece taped in position and suitably cut on three sides; it will then be marked with a pencil for final cut. And now, using Cascamite glue, carefully insert the veneer repair piece into the prepared aperture.
You then place a piece of polythene together with some small sheets of paper and a small block of MDF in a sort of sandwich, and cramp the whole thing down (see photo 8).
Cascamite or similar such glue products usually take between 3 to 4 hours to cure (harden).
When this curing has eventually taken place the whole of the picture is lightly sanded (all over) to ensure the patch assumes the same level as the rest of the picture. |
 View of repair piece showing the cutting marks drawn in
|
|
|
The whole picture is then re-polished using about 10 coats of Rustins or your favourite varnish or finish (see photo 9). |
|
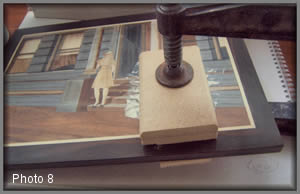 The repaired area placed in the clamping sandwich
|
|
 Photo 9 - The finished repair - as good as new!
|
|
|
As the picture polishing part of the process is not my ultimate forte, I hope you find my polishing comes up to your full expectations Eddie.
Editorial note: Don’t you believe that last sentence, I’ve seen this particular finished repair with my own eyes, and, I have to say that the polishing is superb – as, of course, is the repair itself! Truly excellent work there Alan.
|
|
|
